Saturday, November 7, 2009

Small trimaran

A few years ago Ray designed a small trimaran to be sold as a kit using plywood. It was 3m long and met the international 3 metre rules. It was designed to carry one person and sailed well.


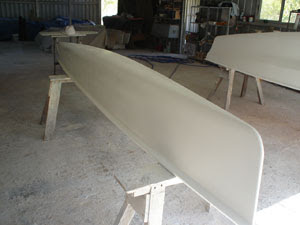
Recently I started building a Scarab 350 trimaran, a small boat designed for two people (ideally one adult and one child). Before I was finished I had many comments on the look of the boat and thought this could be a popular small trimaran to teach kids how to sale. Originally it was built to use as a tender for my dream catamaran. There is a need for a small trimaran to sail in local clubs in this area (SE Queensland) to rival the beach cats. The water of the Great Sandy Traits is conducive to small boat racing and the competition is high. The clubs at Hervey Bay and Tin Can Bay could be great places to race small trimarans. It is not economically feastible to build these boats commerically as a one-off. Ray designed a new boat the same length but round bilge with a folding system similiar to the Scarab 16 http://www.teamscarab.com.au/scarab16/pictures.html. This boat will be built using moulds so we can speed production. The name of the new boat is uncertain;we will have to reach a compromise. The plugs which will be used to create the moulds are partially built.


Tuesday, November 3, 2009

Scarab 18

I have been busy with many projects lately. The Scarab 18 has been painted and Ray is finishing the boat himself. If you want to see more pictures http://www.teamscarab.com.au\construction\scarab-18.html

Sunday, April 12, 2009

Scarab 18 folding trimaran Part 14

The mainhull and floats are ready to paint. There are as many different methods of paint preparation as there are builders. I will describe the method I use.
Because the boat is built with flat panels it is very easy to finish. I used peel ply when the panels were made so they are smooth and require little sanding. Filler is applied in a thin even coat (I use Q cells and polyester resin mixed to a peanut butter consistency). Polyester resin is painted over a small area and while still wet the bog is smoothed on with a metal drywall (gyrock) spreader. Metal is easy to clean and does not react with the resin and you can buy them wide enouth to cover the tape and panels in one go. I found that polyester does not like high humidity and will remain sticky for a long time if applied in the rain. This doesn't happen so much with epoxy. Why builders would use epoxy on a small foam boat at 3 times the cost and the related health hazards is beyond me?
If you are using plywood then the above method works well with epoxy resin.
I sand the panels with a 6" random orbital sander and 40 grit paper.


Saturday, April 11, 2009

Scarab 18 folding trimaran Part 13

The edges of the transom were taped. Wooden support for outboard motor glued into the transom. Plywood inside anchor locker to support fore stay attachment. All joints inside cabin taped. Everything sanded ready for filler.

Total time 470 hours.

The boat is all ready to prepare for painting.

The 470 hours does not include building the frames (which I built for the last boat) and the centreboard and rudder blades which were already built). Filling, sanding and painting times depend on the required finish. Some builders like to finish the inside and paint, some just want to get into the water as quickly as possible. I will post pictures as the boat is finished and painted but there will be no more times posted.

The assembly (joining the floats and the beams to the mainhull) also takes some time. I will post pictures as we go.


Sunday, March 29, 2009

Scarab 18 folding trimaran Part 12

The edges of the cabin top were taped. Cockpit seat risers are taped in. Cockpit seats glassed in and transome added. Windows for the cabin and the lid for the anchor locker were cut out.
Total time 432 hours


Sunday, March 1, 2009

Scarab 18 folding trimaran Part 11

Foam was attached temporarily to the cabin sides. The top was then glassed. The edges finished and taped. Undo the straps connecting the cabin top to the hull and remove the cabin top. It is much easier to add the reinforcing at this point rather than work overhead in a confined space. The main hatch was cut out and reinforced. The cabin top was finished ready to paint before it is attached to the hull. The cabin top was attached to the hull. All the plywood surroundsfor the lockers were glued in place.

Total time 406 hours


Friday, February 20, 2009

Scarab 18 folding trimaran Part 10

The ring frame was taped to the main hull, inside and out. The floor was cut to fit and all the lockers cut out. All the foam was dug out onthe edges of the lockers and filled with bog. The centreboard case was taped in.


I painted under the floor (inside the lockers) because it is hard to paint in these areas after the floor is installed.


The temporary frame for the cabin top was built and the cabin sides attached. The sides were only temporarily attached because the cabin topwill be removed to finish inside.


Total time 356 hours


Wednesday, February 18, 2009

Scarab 18 folding trimaran Part 9

We live in a pretty remote area and the only internet we have here is wireless which doesn't work when it is raining or too windy. So it's up to the weather when I can post to this blog.
Built another beam (all beams built now).

Filled both floats ready to paint.

Total time 301 hours

Friday, February 6, 2009

Scarab 18 folding trimaran Part 8


Bulkheads and main beams taped in the main hull.


Built another beam (three beams built now).


Total time 282 hours

Scarab 18 folding trimaran Part 7

I have jumped from one job to another in this blog because this is how I work. The object is to have as many jobs going at the same time to avoid wasting time. The main reason for this blog is to show how easy the construction is and how many hours it takes for one person to build this boat.
To see a more organised layout see www.teamscarab.com.au/S18designnotes.html


Instead of precovering the panels for the float deck they are covered in place. The laminate is too stiff to bend in the required curve. Scraps of foam are screwed to the side of the float and the foam bent over and attached through the scrap piece.


The deck is laminated with glass cloth and resin. The deck can be removed when it is ready by taking the screws out of the scrap piece of foam and lifting it off the float. Trim the edge and laminate glass cloth on the underside of deck.


Attach the deck with glue and hold down with metal straps until dry. Sand the edges, fair and tape.


Bulkheads were tacked in place in the main hull.

Total time 262 hours


Sunday, January 18, 2009

Scarab 18 folding trimaran Part 6


All the bulkhead were taped in the floats.


Floats are now ready for the deck to be added


Total time 233 hours


Saturday, January 10, 2009

Scarab 18 folding trimaran Part 5

Christmas and New Year are over. It was wonderful to have a rest and recharge the batteries. But hard to go back to work, even though I love what I am doing.

This week the main-hull was taped inside.


The second float was removed from the frame and turned over. It was taped inside. The floats were levelled and the bulkheads were trimmed to fit.


Two main beams (that hold the folding beams) were built using foam and layers of glass and resin.

The holes for the folding system were drilled before attaching the main beams in the main-hull.


Total time 198 hours

Scarab 16 beams part 3

I painted the beams to match the rest of the boat using 2 pack epoxy primer and Jotun Imperite (Home Yellow). The aluminiu...